Description
Parts:
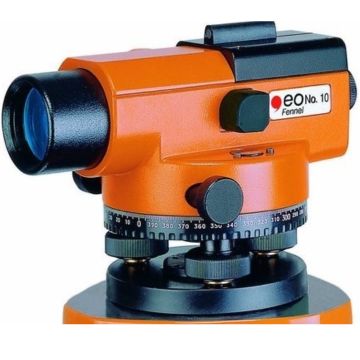
An auto level consists of a telescope with various screws to adjust the line of sight. A tripod is also used to mount and adjust the auto level.

Telescope:
It holds the lenses that magnify objects in the sight.
Objective Lens:
It catches the object being sighted and magnifies the object.
Eyepiece:
It is located at the viewing end of the telescope, it can be turned to bring the crosshairs into focus.
Focusing Knob:
It can be turned to make objects appear crisp and clear.
Leveling Screws:
It allows adjustments to be made to ensure the instrument is level.
Base Plate:
It is the area to which the automatic level attaches on the tripod.
Horizontal Tangent Screw:
It can be adjusted to make the instrument move left or right on the horizontal plate. It is also known as ‘slow motion knobs’.
Circular Level:
It is mounted on the automatic level, it ensures that the instrument is at a true level point.

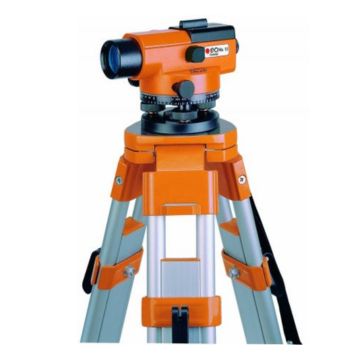
Tripod:
A tripod is a three-legged stand, important in providing the foundation for auto levels and other leveling instruments. It is usually made up of Aluminum for the sake of lightness.
Crosshairs:
It is a diaphragm consisting of horizontal hair and vertical hair fitted in the Telescopic Tube of the Level. Staff is bisected at the intersection of the crosshairs to take the reading.

Operation:
Mounting an Automatic Level:
Firstly the automatic level needs to be mounted on the tripod. For that purpose, the instrument is placed on the head of the tripod carefully such that the nuts under the instrument perfectly aligning with the bolts present on the head of the tripod and then the bolts are tightened with the nuts completing the mounting process.
Levelling an Automatic Level:
Once the auto level is properly mounted on the tripod it then needs to be levelled before taking measurements as unleveled instrument gives blunderous readings. In order to level the automatic level a very simple but efficient enough instrument called “Circular Level” is used. Circular Level is actually a very basic and cost-effective levelling tool, it contains a small bubble floating inside a small circular glass which indicates the state of levelling of a horizontal surface or in this case an instrument on the surface. So to level, the instrument one needs to take that small bubble in the middle of the circular level by adjusting the legs of the Tripod and by moving the levelling screws carefully. When the bubble comes in the middle of the circle the automatic level will then be considered as levelled and ready to take measurements.
Focusing an Automatic Level:
After setting up the automatic level, the next step is focusing the automatic level. Firstly the telescope is aimed at the target and is roughly aligned with the target by means of “Alidade”. When seen through the eyepiece the target may look blurry but turning the focusing knob either left or right should make the object appear clearer.
Making a Reference Line:
After careful setup of the level, the height of the crosshair is determined by either sighting from a known benchmark with the known height determined by a previous survey or an arbitrary point with an assumed height is used.
Sighting is done with an assistant surveyor who holds a graduated staff vertical at the point under measurement. The surveyor rotates the telescope until the graduated staff is in the crosshairs and records the reading. This is repeated for all sightings from that datum. The instrument should be moved to another position within sighting distance, it is re-leveled, and a sighting taken of a known level in the previous survey.

Reviews
There are no reviews yet.